
Create your first payment form
A payment form is a page where your customers enter their details and pay you. Create one in a few minutes, then share its link. This is step 4 of 4 to your first sale.
Have your form title, description, price and a featured image (980 x 580 pixels works well) ready before you start.
Create the form
Section titled “Create the form”Start from the forms list:
- Go to Payments > Forms.
- Click Create Form. The Create New Payment Form page opens.
Add the basic information
Section titled “Add the basic information”The Basic Information tab holds what your customer sees first:
- Enter a Title. BCL fills in the URL Slug from it, and shows the form’s full link underneath. You can change the slug.
- Optional: add a Form Label to tag the form. Labels are for your team only, and customers do not see them.
- Add a Featured Image. It appears at the top of the form and on your BCL homepage.
- Write a Description of what the customer is paying for.
To collect extra information, such as a company name or a size, open the Custom Field Form tab and click Add Custom Field.
Set the price and payment options
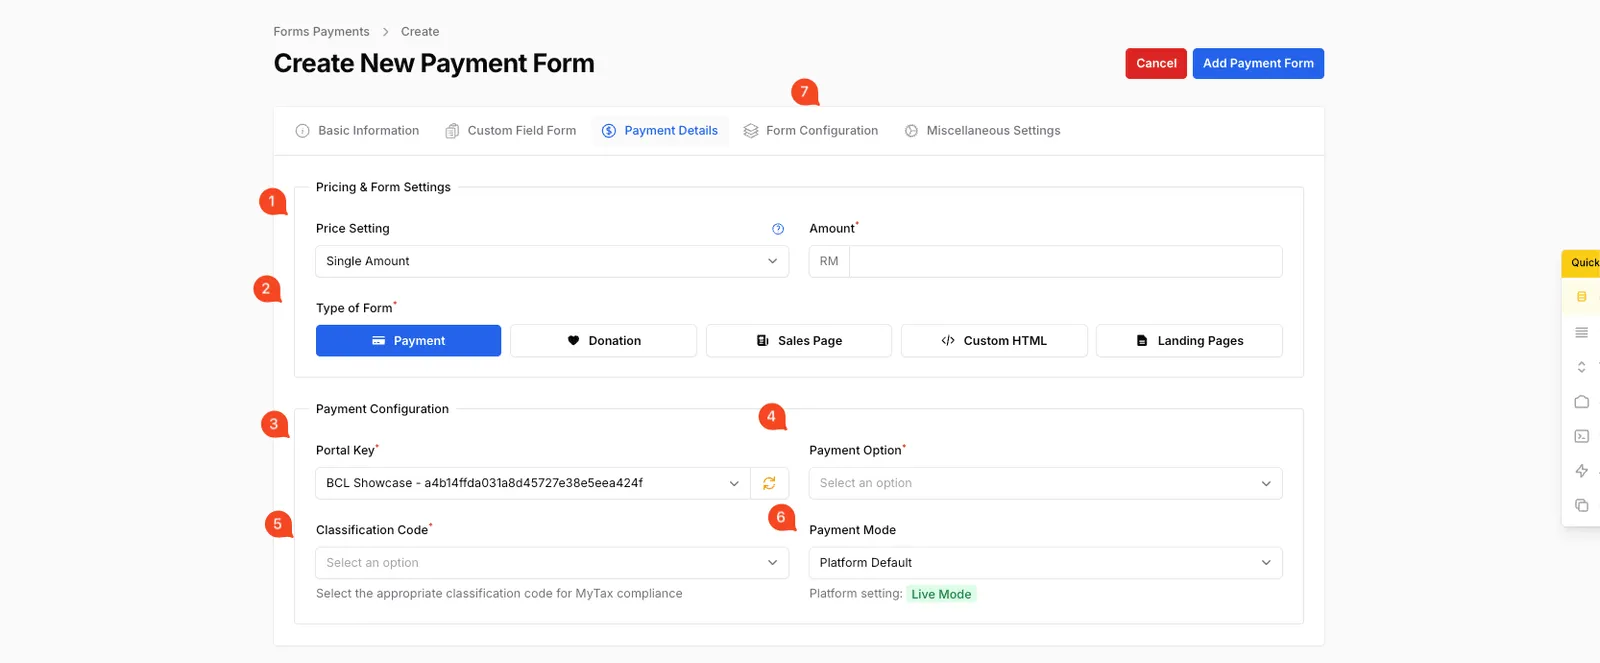
Section titled “Set the price and payment options”On the Payment Details tab, set how the customer pays:
- In Price Setting, choose Single Amount, Open Amount (User Input), Multiple Items or Items with Variations.
- For Single Amount, enter the Amount.
- Choose the Type of Form. Payment suits most sales. See Choose a form type.
- Under Payment Configuration, check the Portal Key and choose one or more Payment Option methods. See Choose a Bayarcash portal key.
- Choose a Classification Code for LHDN. Use 022 - Others if none fits.
- Leave Payment Mode on Platform Default to follow your account setting, or pick Test Mode or Live Mode for this form only.
Check the form settings and publish
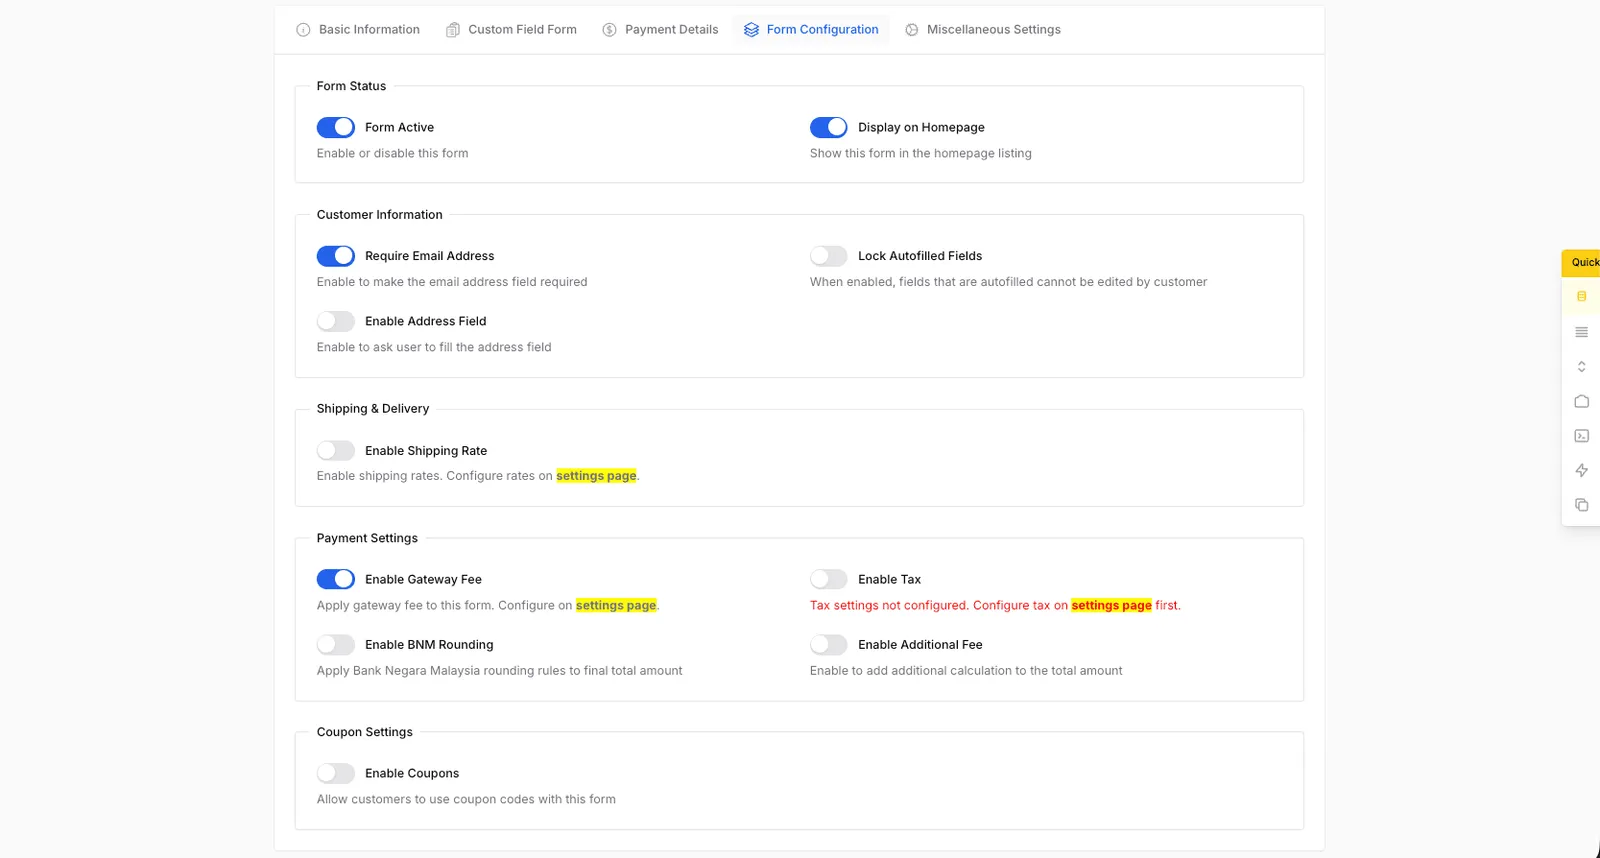
Section titled “Check the form settings and publish”The Form Configuration tab has the switches that control the form:
- Keep Form Active on so customers can pay.
- Keep Display on Homepage on to list the form on your homepage.
- Under Payment Settings, choose whether Enable Gateway Fee adds the gateway fee to the customer’s total.
- Click Add Payment Form.
To see the form as your customer will, go to Payments > Forms and click View Form in the Live Form column. Then share its link.
Common issues
How can I test a form before customers use it?
Set the form's Payment Mode to Test Mode on the Payment Details tab. Payments on that form go to the Bayarcash sandbox, while your other forms stay live.
How many custom fields can one form have?
Up to 20 custom fields per form. Drop-down, checkbox, radio and button fields can each have up to 20 options.
Which Classification Code should I choose?
Pick the LHDN code that matches what you sell. If none fits, choose 022 - Others.
Was this article helpful?
Thanks for your feedback.
Sorry this didn't help. WhatsApp us and we'll sort it out with you.